How to edit Rich Text fields in a custom page in the eZ Platform Admin UI
By: Paulo Valle | February 3, 2020 | ez platform and rich text
The Rich Text field is one of the most powerful fields in eZ Platform. It enables editors to format content using headers, paragraphs, bold, italic, and much more. It is natively included when you edit content in the eZ Platform Admin UI. Sometimes, however, you need to add editing capabilities to custom pages outside of the standard editing experience. Here’s how to enable editing Rich Text field content on any custom page on your website.
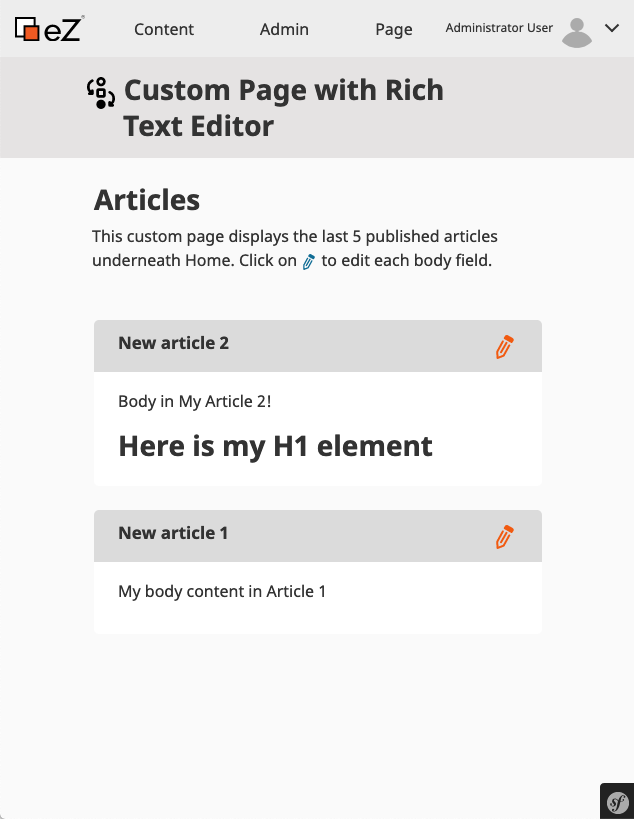
To create a better editing experience for one of our clients, we decided to build a multi-edit custom page. In other words, they can edit multiple content items at the same time on the same page. These items each have at least one Rich Text field. In this article, we'll walk through the steps to create such an editorial experience. Once we're done, we'll have a page that displays the contents of multiple articles, and enables you to edit their Rich Text fields inline on the page:
Note that the most current version of eZ Platform at the time this post was written is eZ Platform 2.5.
1. Preparing your environment
1.1 Create your bundle
You can create a new Bundle for your code. This is not mandatory, but it may help you to keep your templates, controllers, configuration, and other files more organized. For this article, we have the MugoRichTextDemoBundle bundle. So, our namespace is Mugo\RichTextDemoBundle. eZ has some good documentation about bundles in eZ Platform. When you run the command below, it will prompt you to determine the bundle name, location, configuration format, and default structure.
$ php bin/console generate:bundle
1.2 Create some content
Create a few Article content items under the root of your site. Our custom page will load 5 Article content items and display their Body fields.
2. Custom page implementation
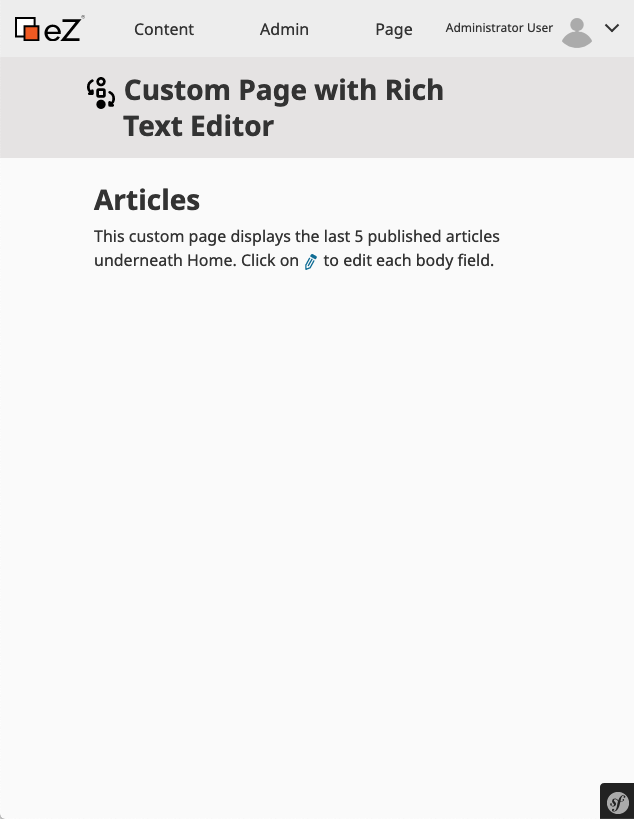
In this step, let's create the custom page that will display the Article content items. Once this step is complete, your page will look like this:
2.1 Create a route
First, create a route to load the custom page template. Insert the following code in src/Mugo/RichTextDemoBundle/Resources/config/routing.yml. Note that this page will be accessible only in the admin_group siteaccess(es), thus <admin-ui-url>/RichTextDemo.
rich_text_demo_bundle.custom_page.list:
    path: /RichTextDemo
    defaults:
        _controller: MugoRichTextDemoBundle:CustomPage:list
        siteaccess_group_whitelist: ['admin_group']
2.2 Add the custom page controller
The route calls the custom page controller, defined in src/Mugo/RichTextDemoBundle/Controller/CustomPageController.php. The listAction() function is where we will place our PHP code.
<?php
namespace Mugo\RichTextDemoBundle\Controller;
use Symfony\Bundle\FrameworkBundle\Controller\Controller;
use eZ\Publish\API\Repository\ContentService;
use eZ\Publish\API\Repository\SearchService;
use eZ\Publish\API\Repository\Values\Content\LocationQuery;
use eZ\Publish\API\Repository\Values\Content\Query;
use eZ\Publish\API\Repository\Values\Content\Query\Criterion;
class CustomPageController extends Controller
{
    /** @var \eZ\Publish\API\Repository\Repository */
    protected $repository;

    /** @var \eZ\Publish\API\Repository\SearchService */
    protected $searchService;
    /** @var \eZ\Publish\API\Repository\LocationService */
    private $locationService;
    /** @var \eZ\Publish\API\Repository\ContentService */
    private $contentService;

    /*
     * List Action
     * Load the Custom Page content
     */
    public function listAction()
    {
        $this->setDefaults();
        $articles = $this->getArticles();
        return $this->render('MugoRichTextDemoBundle:themes/admin:custom-page/full.html.twig', [
            'articles' => $articles,
        ]);
    }
    /*
     * setDefaults()
     * Load some useful classes in the Controller
     */
    protected function setDefaults()
    {

        $this->repository        = $this->container->get( 'ezpublish.api.repository' );
        $this->searchService     = $this->repository->getSearchService();
        $this->locationService   = $this->repository->getLocationService();
        $this->contentService    = $this->repository->getContentService();
    }
    /*
     * getArticles()
     * Return an array with Article content items
     */
    protected function getArticles(){

        $query = new LocationQuery();

        $query->filter = new Query\Criterion\LogicalAnd(
            array(
                new Query\Criterion\ParentLocationId( 2 ),
                new Query\Criterion\ContentTypeIdentifier( 'article' ),
                new Query\Criterion\Visibility( Query\Criterion\Visibility::VISIBLE ),
            )
        );

        $query->sortClauses = array(
            new Query\SortClause\DatePublished(LocationQuery::SORT_DESC),
            new Query\SortClause\ContentName(LocationQuery::SORT_DESC)
        );

        $query->limit = 5;
        $result = $this->searchService->findContentInfo($query);
        $articles = array();

        foreach ($result->searchHits as $searchHit) {
            $location = '';
            try {
                $location = $this->locationService->loadLocation( $searchHit->valueObject->mainLocationId );
            } catch (Exceptions\NotFoundException $e) {
                $this->logger->info('Can\'t find location id: ' . $searchHit->valueObject->mainLocationId);
            } catch (Exceptions\UnauthorizedException $e) {
                $this->logger->info('Unauthorized access to location id: ' . $searchHit->valueObject->mainLocationId);
            }
            $content = '';
            try {
                $content = $this->contentService->loadContent( $searchHit->valueObject->id );
            } catch (Exceptions\NotFoundException $e) {
                $this->logger->info('Can\'t find content id: ' . $searchHit->valueObject->id);
            } catch (Exceptions\UnauthorizedException $e) {
                $this->logger->info('Unauthorized access to content id: ' . $searchHit->valueObject->id);
            }
            $articles[] = array(
                'name'          => $searchHit->valueObject->name,
                'content_id'    => $searchHit->valueObject->id,
                'content'       => $content,
                'location_id'   => $searchHit->valueObject->mainLocationId,
                'location'      => $location,
            );
        }

        return $articles;
    }
}
2.3 Add custom page template
The custom page controller will render the template src/Mugo/RichTextDemoBundle/Resources/views/themes/admin/custom-page/full.html.twig.
{% extends 'EzPlatformAdminUiBundle::layout.html.twig' %}
{% block title %}{{ 'Demo Content'|trans }}{% endblock %}
{%- block meta -%}<meta name="LanguageCode" content="{{ app.request.get('_locale') }}">{% endblock %}
{% block body_class %}ez-standalone-page{% endblock %}
{%- block page_title -%}
    {% include '@EzPlatformAdminUi/parts/page_title.html.twig' with {
        title: 'url.list'|trans|desc('Custom Page with Rich Text Editor'),
        iconName: 'workflow'
    } %}
{%- endblock -%}
{%- block content -%}
    <section class="container my-4">
        <section class="ez-fieldgroup container">
            <div class="ez-content-field mb-5">
                <h1>Articles</h1>
                <p>This custom page displays the last 5 published articles underneath Home. Click on <svg class="ez-icon ez-icon--small ez-icon--secondary ez-icon-edit"><use xlink:href="/bundles/ezplatformadminui/img/ez-icons.svg#edit"></use></svg> to edit each body field.</p>
            </div>
        </section>

        {% if articles is defined and articles %}
            {% for article in articles %}

                {% include 'MugoRichTextDemoBundle:themes/admin:custom-page/article.html.twig' with { article: article }%}
            {% endfor %}
        {% endif %}
    </section>
{%- endblock -%}
The template loops through the articles and includes another template to display each article. Create src/Mugo/RichTextDemoBundle/Resources/views/themes/admin/custom-page/article.html.twig and leave it empty for now.
3. Setting up the Rich Text editor
It is time to set up the Rich Text editor implementation. The Rich Text field’s formatting functionality is based on AlloyEditor, itself based on CKEditor. In general, the Rich Text editor is a JavaScript library that brings the formatting features to the field. Thus, the front-end implementation will load the JavaScript and CSS files and integrate them into our template.
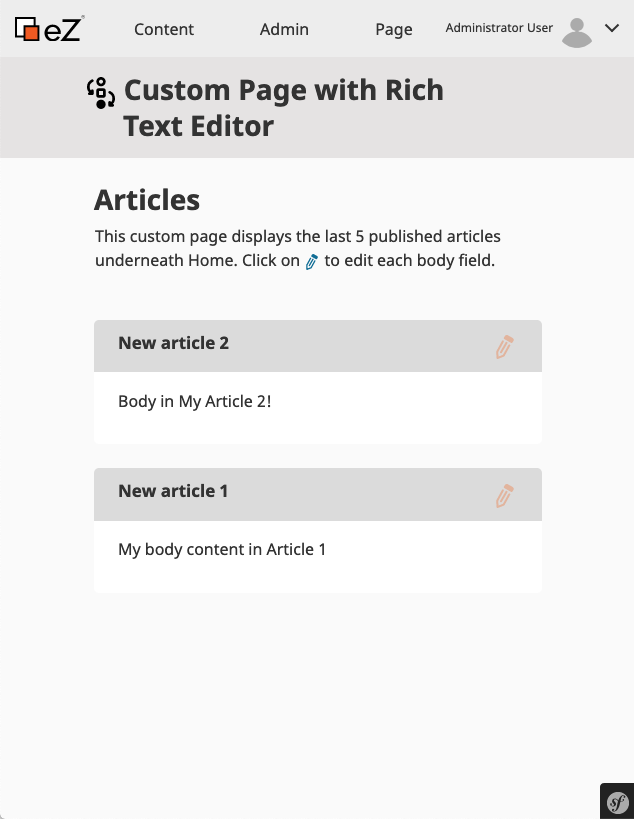
Once we have finished this step, our custom page will look like the image below, although it won't yet be functional until we implement the back-end code.
3.1 Add the Rich Text templates
The time to work on the src/Mugo/RichTextDemoBundle/Resources/views/themes/admin/custom-page/article.html.twig template has arrived. This template will display a box with the name of the article, the body content, and an Edit button. The Rich Text editor will be included in the <div> tags with the "attribute-editor" class.
<section class="ez-fieldgroup container">
    <div class="ez-content-field">

        <div class="ez-content-field-name">
            <div class="row align-items-center">

                <div class="col py-1">
                    <h6 class="mb-o">{{ article.name }}</h5>
                </div>
                <div class="col-auto">
                    <span class="icon-load d-none">
                        <svg class="ez-icon ez-icon--medium spin-animation" aria-hidden="true">
                            <use xlink:href="/bundles/ezplatformadminui/img/ez-icons.svg#spinner"></use>
                        </svg>
                    </span>
                    <a class="btn btn-icon btn-edit-discard d-none" data-content-id="{{ article.content_id }}" data-field-identifier="body">
                        <svg class="ez-icon ez-icon-discard">
                            <use xlink:href="/bundles/ezplatformadminui/img/ez-icons.svg#discard"></use>
                        </svg>
                    </a>
                    <a class="btn btn-icon btn-edit disabled" data-content-id="{{ article.content_id }}" data-field-identifier="body">
                        <svg class="ez-icon ez-icon-edit">
                            <use xlink:href="/bundles/ezplatformadminui/img/ez-icons.svg#edit"></use>
                        </svg>
                    </a>
                </div>
            </div>
        </div>

        <div class="ez-content-field-value article-attribute">
            <div class="row">

                <div class="col-12">

                    <!-- Content -->
                    <div class="attribute-content">
                        {% if article.content.fields['body'] is defined %}
                            {{  ez_field_value(article.content, 'body').xml|richtext_to_html5 }}
                        {% endif %}
                    </div>
                    <!-- Editor -->
                    <div class="attribute-editor d-none">
                        {% include 'MugoRichTextDemoBundle:themes/admin:custom-page/richtext-editor.html.twig' %}
                    </div>
                </div>

            </div>
        </div>
    </div>
</section>
The src/Mugo/RichTextDemoBundle/Resources/views/themes/admin/custom-page/richtext-editor.html.twig template file contains the Rich Text structure to load the AlloyEditor in it. In the <div> tag with the "ez-data-source" class, there is a <textarea> element that AlloyEditor uses to store the Rich Text editor content. The <div> tag with the "ez-data-source__richtext" class is the area where the AlloyEditor will enable the editing interface. At the bottom, we have the "Save" button. The code looks like this:
<div class="ez-field-edit ez-field-edit--article-edit ez-field-edit--required">
<div class="ez-field-edit__label-wrapper">
<label class="ez-field-edit__label ez-label" for="ezrepoforms_content_edit_fieldsData_body_value">{{ 'Edit body attribute'|trans }}</label>
</div>
<div class="ez-field-edit__data">
<div class="ez-data-source">
{% set udw_context = {
'languageCode': 'en',
} %}
<textarea
id="ezrepoforms_content_edit_fieldsData_body_value"
name="ezrepoforms_content_edit[fieldsData][body][value]"
class="ez-data-source__input form-control d-none"><?xml version="1.0" encoding="UTF-8"?> <section xmlns="http://ez.no/namespaces/ezpublish5/xhtml5/edit"/></textarea>
<div class="hidden" data-udw-config-name="richtext_embed" data-udw-config="{{ ez_udw_config('richtext_embed', udw_context) }}"></div>
<div class="hidden" data-udw-config-name="richtext_embed_image" data-udw-config="{{ ez_udw_config('richtext_embed_image', udw_context) }}"></div>
<div class="ez-data-source__richtext border px-3 py-3" id="rich_text_content_{{ article.content_id }}__editable"></div>
<div class="ez-richtext-tools">
<ul class="ez-elements-path"></ul>
{% if ez_user_settings['character_counter'] == 'enabled' %}
<div class="ez-character-counter">
<span class="ez-character-counter__word-count">0</span> {{ 'character_counter.words'|trans|desc('words') }}
<span class="ez-character-counter__character-count">0</span> {{ 'character_counter.characters'|trans|desc('characters') }}
</div>
{% endif %}
</div>
</div>
</div>
</div>
<div class="form-group">
<button type="button" class="btn btn-primary font-weight-bold btn-save-content">Save Rich Text</button>
</div>
3.2 Add CSS and JavaScript files
In order to add your own CSS and JavaScript files to the eZ Platform Admin UI, you need to add them with Webpack Encore. So, let’s create the file src/Mugo/RichTextDemoBundle/Resources/encore/ez.config.js as follows:
const path = require('path');
module.exports = (Encore) => {
    Encore.addEntry('rich-text-demo-css', [
        path.resolve('./vendor/ezsystems/ezplatform-admin-ui/src/bundle/Resources/public/scss/_mixins.scss'),
        path.resolve(__dirname, '../public/scss/styles.scss')
    ]);
    Encore.addEntry('rich-text-demo-js', [
        path.resolve('./web/bundles/ezplatformadminui/js/scripts/fieldType/base/base-field.js'),
        path.resolve('./web/bundles/ezplatformadminui/js/scripts/fieldType/base/base-rich-text.js'),
        path.resolve('./web/bundles/ezplatformadminui/js/scripts/fieldType/ezrichtext.js'),
        path.resolve(__dirname, '../public/js/script.js')
    ]);
};
Two entries were created, first, “demo-css”, which includes _mixins.scss and demo.scss, which has Sass files that Webpack Encore can compile. Second, “demo-js” includes some required JavaScript files from eZ Platform as well as demo-richtext.js, where we’ll write some custom JavaScript for the page.
After including the ez.config.js file, run the commands to symlink the assets to the "web" folder, clear the cache, and prepare all the necessary JavaScript files, CSS files, and design images. Remember that "$env" is your environment (usually "dev", "stage", or "prod"):
$ php bin/console assets:install --symlink --env=$env
$ php bin/console cache:clear --env=$env
$ php bin/console assetic:dump --env=$env
The Encore entries can then be compiled with the following command:
$ yarn encore $env [--watch]
In src/Mugo/RichTextDemoBundle/Resources/public/scss/styles.scss, include the following lines to create a spinner icon when the Rich Text editor is loading:
.spin-animation {
    animation-name: spin;
    animation-duration: 2000ms;
    animation-iteration-count: infinite;
    animation-timing-function: linear;
}
@keyframes spin {
    from {
        transform:rotate(0deg);
    }
    to {
        transform:rotate(360deg);
    }
}
Then, create src/Mugo/RichTextDemoBundle/Resources/public/js/script.js file with the following code, which is responsible for getting the content of the field through Ajax when the Edit button is clicked, as well as saving the content. The saveData() and getData() functions are responsible for communicating with the back-end.
(function(global, doc, eZ, $) {
    // global values
    const SELECTOR_FIELD    = '.ez-field-edit';
    const SELECTOR_INPUT    = '.ez-data-source__richtext';
    const SELECTOR_EDIT_BTN = '.btn-edit';
    const GET_FIELD_DATA_URL    = '/RichTextDemo/getfield';
    const SAVE_FIELD_DATA_URL   = '/RichTextDemo/save';
    // save content
    const saveData = (contentId, fieldIdentifier, content, successCallback, validationCallback, errorCallback) => {
        fetch(SAVE_FIELD_DATA_URL, {
            method: 'POST',
            body: JSON.stringify({
                contentId: parseInt(contentId),
                fieldIdentifier: fieldIdentifier,
                content: content,
            })
        })
        .then((response) => {
            if (response.ok) {
                successCallback(response);
            } else {
                validationCallback(response);
            }
        })
        .catch((err) => {
            errorCallback(err);
        });
    };
    // get content
    const getData = (contentId, fieldIdentifier) => {
        return fetch(GET_FIELD_DATA_URL + '/' + contentId + '/' + fieldIdentifier)
            .then(function(response) {
                return response.json();
            });
    };

    // the edit button
    doc.querySelectorAll('.btn-edit').forEach((editBtn) => {

        const richtextContainer = editBtn.closest('.ez-content-field').querySelector(`${SELECTOR_FIELD} ${SELECTOR_INPUT}`);
        const textarea = richtextContainer.closest('.ez-data-source').querySelector('textarea');

        editBtn.classList.remove('disabled');
        // on click
        editBtn.addEventListener('click', (event) => {

            const btn = event.currentTarget;
            const {contentId, fieldIdentifier} = btn.dataset;

            // content/editor areas of the system
            const attrContent = editBtn.closest('.ez-content-field').querySelector('.attribute-content');
            const attrEditor  = editBtn.closest('.ez-content-field').querySelector('.attribute-editor');
            // other top interface elements
            const discartBtn  = editBtn.parentElement.querySelector('.btn-edit-discard');
            const loadingIcon = editBtn.parentElement.querySelector('.icon-load');
            loadingIcon.classList.remove('d-none');
            attrContent.classList.add('d-none');
            editBtn.classList.add('d-none');
            // get the attribute
            const dataFetched = getData(contentId, fieldIdentifier);
            dataFetched.then((value) => {
                loadingIcon.classList.add('d-none');
                discartBtn.classList.remove('d-none');
                attrEditor.classList.remove('d-none');

                textarea.value = value.richtext;
                const richtext       = new global.eZ.BaseRichText();
                const alloyEditor    = richtext.init(richtextContainer);
                const btnSaveContent = attrEditor.querySelector('.btn-save-content');
                const handleSave = () => {

                    // block the actions
                    loadingIcon.classList.remove('d-none');
                    discartBtn.classList.add('disabled');
                    btnSaveContent.classList.add('disabled');
                    saveData(contentId, fieldIdentifier, textarea.value,
                        (successCallback) => {
                            eZ.helpers.notification.showSuccessNotification('The ' + fieldIdentifier + ' attribute has been saved.');
                            discartBtn.click();
                        },
                        (validationCallback) => {
                            eZ.helpers.notification.showErrorNotification('Validation of XML content failed: The content has extra attributes');
                            loadingIcon.classList.add('d-none');
                            discartBtn.classList.remove('disabled');
                            btnSaveContent.classList.remove('disabled');
                            return;
                        },
                        (errorMessage) => {
                            if (errorMessage) {
                                eZ.helpers.notification.showErrorNotification(errorMessage);
                                loadingIcon.classList.add('d-none');
                                discartBtn.classList.remove('disabled');
                                btnSaveContent.classList.remove('disabled');
                                return;
                            }
                        }
                    );
                };

                btnSaveContent.addEventListener('click', handleSave, false);
                const closeEdit = () => {

                    alloyEditor.destructor();
                    btnSaveContent.removeEventListener('click', handleSave);
                    loadingIcon.classList.add('d-none');
                    discartBtn.classList.remove('disabled');
                    btnSaveContent.classList.remove('disabled');
                    loadingIcon.classList.remove('d-none');
                    attrEditor.classList.add('d-none');
                    discartBtn.classList.add('d-none');
                    // get the attribute and update the content
                    const dataUpdated = getData(contentId, fieldIdentifier);
                    dataUpdated.then((value) => {

                        attrContent.innerHTML = value.richtext;
                        attrContent.classList.remove('d-none');
                        loadingIcon.classList.add('d-none');
                        editBtn.classList.remove('d-none');
                        discartBtn.removeEventListener('click', closeEdit, false);
                    });
                }
                discartBtn.addEventListener('click', closeEdit, false);
            });

        });
    });
})(window, window.document, window.eZ, window.jQuery);
The last step of the front-end implementation is to include the SCSS and the JS files in src/Mugo/RichTextDemoBundle/Resources/views/themes/admin/custom-page/full.html.twig. At the bottom of the file, add the following lines:
{% block stylesheets %}

    {{ parent() }}
    {{ encore_entry_link_tags('ezplatform-admin-ui-alloyeditor-css', null, 'ezplatform') }}
    {{ encore_entry_link_tags('rich-text-demo-css', null, 'ezplatform') }}
{% endblock %}
{% block javascripts %}

    {{ encore_entry_script_tags('ezplatform-admin-ui-alloyeditor-js', null, 'ezplatform') }}
    {{ encore_entry_script_tags('rich-text-demo-js', null, 'ezplatform') }}
{% endblock %}
4. Back-end implementation
The back-end implementation does the work of getting and saving the content.
4.1 Create Save and Get routes
Include the following settings in src/Mugo/RichTextDemoBundle/Resources/config/routing.yml. The rich_text_demo_bundle.custom_page.getfield route will get the content in {fieldIdentifier} of the content item ID specified in {contentId}. And the rich_text_demo_bundle.custom_page.save route will save the content submitted via Ajax.
rich_text_demo_bundle.custom_page.getfield:
    path: /RichTextDemo/getfield/{contentId}/{fieldIdentifier}
    defaults:
        _controller: MugoRichTextDemoBundle:CustomPage:getField
        siteaccess_group_whitelist: ['admin_group']
    requirements:
        contentId: '\d+'
    methods: [GET]
rich_text_demo_bundle.custom_page.save:
    path: /RichTextDemo/save
    defaults:
        _controller: MugoRichTextDemoBundle:CustomPage:save
        siteaccess_group_whitelist: ['admin_group']
    methods: [POST]
4.2 Add the Rich Text handler class
The RichText class lives at src/Mugo/RichTextDemoBundle/Lib/RichText.php and handles the direct data interaction to and from the Rich Text field.
<?php
declare(strict_types=1);
namespace Mugo\RichTextDemoBundle\Lib;
final class RichText
{
    /** @var int */
    private $contentId;
    /** @var string */
    private $fieldIdentifier;
    /** @var string */
    private $content;
    /**
     * @return int
     */
    public function getContentId(): int {
        return $this->contentId;
    }
    /**
     * @param int $contentId
     */
    public function setContentId(int $contentId): void {
        $this->contentId = $contentId;
    }

    /**
     * @return string
     */
    public function getFieldIdentifier(): string {
        return $this->fieldIdentifier;
    }

    /**
     * @param string $fieldIdentifier
     */
    public function setFieldIdentifier(string $fieldIdentifier): void {
        $this->fieldIdentifier = $fieldIdentifier;
    }

    /**
     * @return string
     */
    public function getContent(): string {
        // remove styles, ids and dir attribute from the tags
        $content = $this->content;
        $content = preg_replace('/ style="(.*?)"/', '', $content);
        $content = preg_replace('/ id="(.*?)"/', '', $content);
        $content = preg_replace('/ dir="(.*?)"/', '', $content);

        return $content;
    }
    /**
     * @param string $content
     */
    public function setContent(string $content): void {
        $this->content = $content;
    }

}
4.3 Update the CustomPage controller
The final step is to update src/Mugo/RichTextDemoBundle/Controller/CustomPageController.php file with the Save and GetField actions.
Include the following namespace references at the top:
use Symfony\Component\HttpFoundation\Request;
use Symfony\Component\HttpFoundation\Response;
use Symfony\Component\Serializer\SerializerInterface;
use Mugo\RichTextDemoBundle\Lib\RichText;
Then, in the CustomPageController class, add the following private variables. Serializer, provided by Symfony, helps you to serialize and deserialize objects in different formats such as JSON and XML. Here, it will help us to organize the data coming from the front-end. The rich text converter will convert the stored data from XML to the HTML that the AlloyEditor uses.
/** @var \Symfony\Component\Serializer\SerializerInterface */
private $serializer;
/** @var \EzSystems\EzPlatformRichText\eZ\RichText\Converter */
private $richtextConverter;
In the setDefaults protected function, set values to the new variables:
$this->serializer        = $this->container->get( 'fos_js_routing.serializer' );
$this->richtextConverter = $this->container->get( 'ezrichtext.converter.edit.xhtml5' );
Add the getFieldAction function as shown below:
public function getFieldAction(int $contentId, string $fieldIdentifier): Response {

    $this->setDefaults();

    try {

        $content = $this->contentService->loadContent($contentId);

        return new Response(
            $this->serializer->serialize(
                ['richtext' => $this->richtextConverter->convert($content->getFieldValue($fieldIdentifier)->xml)->saveXML()],
                'json'
            ),
            200
        );
    } catch (NotFoundException $e) {
        return new Response($e->getMessage(), 404);
    } catch (UnauthorizedException $e) {
        return new Response($e->getMessage(), 500);
    }
}
And finally, add the saveAction function:
public function saveAction(Request $request): Response {

    $this->setDefaults();
    /** @var RichText $richText */
    $richText = $this->serializer->deserialize(
        $request->getContent(),
        RichText::class,
        'json'
    );

    try {
        $content = $this->contentService->loadContent($richText->getContentId());

        $contentInfo = $content->contentInfo;
        $contentDraft = $this->contentService->createContentDraft($contentInfo);

        $contentUpdateStruct = $this->contentService->newContentUpdateStruct();
        $contentUpdateStruct->setField($richText->getFieldIdentifier(), $richText->getContent());

        $contentDraft = $this->contentService->updateContent($contentDraft->versionInfo, $contentUpdateStruct);
        $content = $this->contentService->publishVersion($contentDraft->versionInfo);

        return new Response('', 200);
    } catch (NotFoundException $e) {
        return new Response($e->getMessage(), 404);
    } catch (UnauthorizedException $e) {
        return new Response($e->getMessage(), 401);
    } catch (BadStateException | ContentFieldValidationException | ContentValidationException | InvalidArgumentException $e) {
        return new Response($e->getMessage(), 304);
    }
}
Testing the results
With that in place, your custom page is complete, with multiple Rich Text fields to edit!
Click on the Edit icon of any Article content item to load the body content in the Rich Text editor.
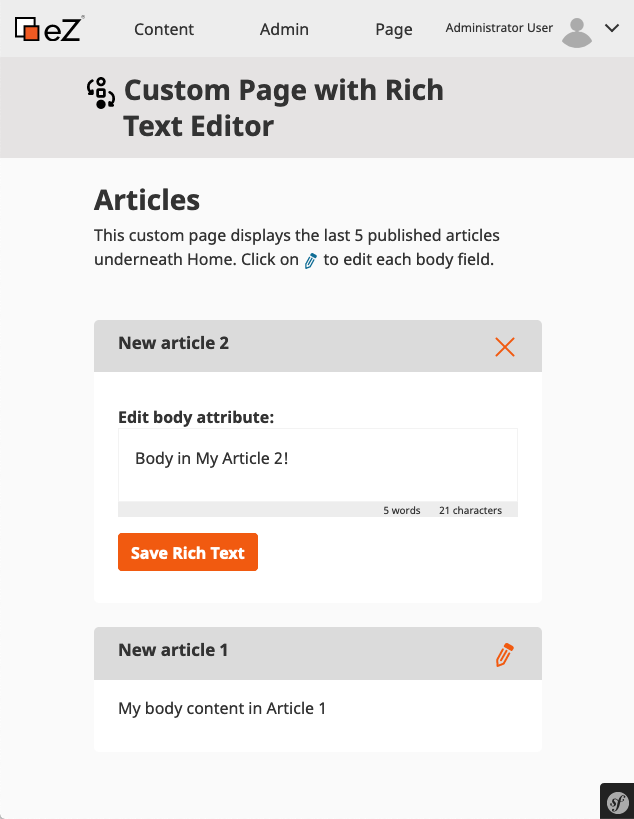
Then, edit your field.
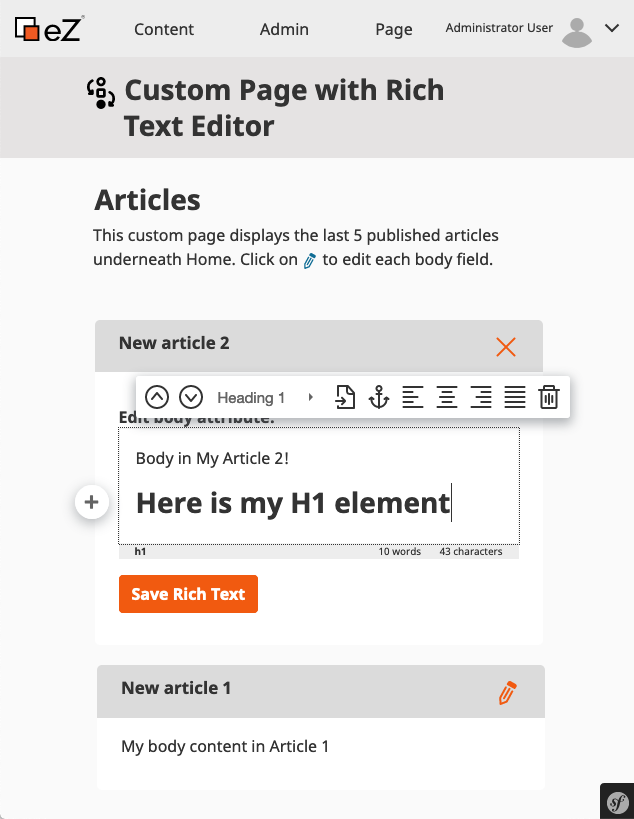
Once you have saved the Rich Text field contents, the editor will collapse and display the new content.
Conclusion
The Rich Text field is powerful, and in a few steps, you can load and edit its contents on any page. What is your implementation? Share your experience with us and let’s learn together.
Special thanks to Kamil Madejski from eZ Systems who helped us with this implementation.