Custom tags in eZ Platform with legacy bridge without XSL
By: Thiago Campos Viana | September 20, 2018 | eZ Publish development tips and Front-end development
In a previous blog post we covered how to create custom tags in eZ Platform (with the legacy bridge or eZ Publish 5.x). The most difficult part of that process was building the XSL to output the custom tag HTML. But there's a simpler way to do it, which allows the developer to use Twig template code instead of XSL.
Before you start, check out the previous blog post for an overview on how to set up the XMLConverter service and other important details related to files mentioned in this tutorial.
First, we are going to change the src/test/BaseBundle/Resources/custom_tags.xsl code:
<?xml version="1.0" encoding="UTF-8"?>
<xsl:stylesheet
    version="1.0"
    xmlns:xsl="http://www.w3.org/1999/XSL/Transform"
    xmlns:php="http://php.net/xsl"
    xmlns:xhtml="http://ez.no/namespaces/ezpublish3/xhtml/"
    xmlns:custom="http://ez.no/namespaces/ezpublish3/custom/"
    xmlns:image="http://ez.no/namespaces/ezpublish3/image/"
    exclude-result-prefixes="xhtml custom image php">
    <xsl:output method="html" indent="yes" encoding="UTF-8"/>
    <xsl:template match="custom">
        <xsl:value-of select="." disable-output-escaping="yes" />
    </xsl:template>
</xsl:stylesheet>
That means we're not going to use XSL to manipulate the custom tag rendering. Instead, we're simply outputting the default XML node info.
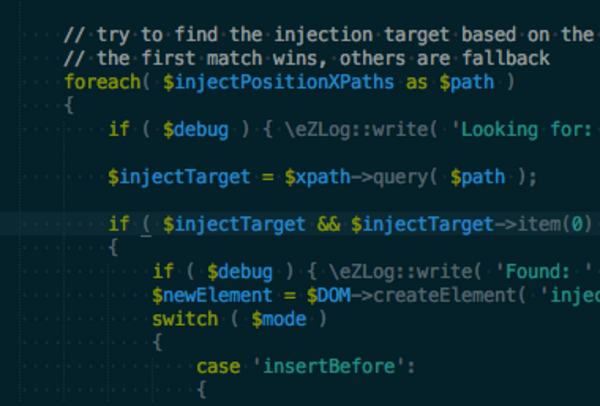
Then we can update the src/test/BaseBundle/Services/XMLConverter.php code and extract the custom tag data.
    public function convert( \DOMDocument $XMLDoc, $contentId )
    {
    ...
        // you can create customized code for each custom tag
        // in this case we have a "youtube" custom tag with 3 attributes (width, height, video_id)
        $elements = $xpath->query("//custom[@name='youtube']");
        if ($elements->length)
        {
            for ($elementIndex = $elements->length - 1; $elementIndex >= 0; $elementIndex--)
            {
                // we pass the necessary data to the Twig template specifying the template path
                // it will return the processed HTML output
                $rendered        = $this->container->get('twig')->render(
                    'TestBaseBundle:custom_tags:youtube.html.twig',
                    array(
                            'width'           => $elements->item( $elementIndex )->attributes->getNamedItem( 'width') ? $elements->item($elementIndex)->attributes->getNamedItem( 'width')->nodeValue : '',
                            'height'     => $elements->item( $elementIndex )->attributes->getNamedItem( 'height') ? $elements->item($elementIndex)->attributes->getNamedItem( 'height')->nodeValue : '',
                            'video_id'     => $elements->item( $elementIndex )->attributes->getNamedItem( 'video_id') ? $elements->item($elementIndex)->attributes->getNamedItem( 'video_id')->nodeValue : '',
                        )
                );
                // here is the trick, we set the current nodeValue to an empty string
                // then we append the rendered Twig code as CDATA
                // so, the only thing that is going to be rendered as HTML is the twig template code result
                $elements->item($elementIndex)->nodeValue = "";
                $elements->item($elementIndex)->appendChild(new \DOMCdataSection($rendered));
            }
        }
    ...
    }
Here is the src/test/BaseBundle/Resources/views/custom_tags/youtube.html.twig custom tag template code:
<div class="media-box {% if width is defined and width and height is defined and height %} responsive-videoMobile{% else %} responsive-video{% endif %}">
    <iframe
        id="ytplayer-{{ video_id }}-{{ date().timestamp }}_{{ random(1000) }} "
        width="{{ width is defined and width  ?  width : '640' }}"
        height="{{ height is defined and height  ?  height : '360' }}"
        src="https://www.youtube.com/embed/{{ video_id }}?enablejsapi=1"
        frameborder="0"
    ></iframe>
</div>
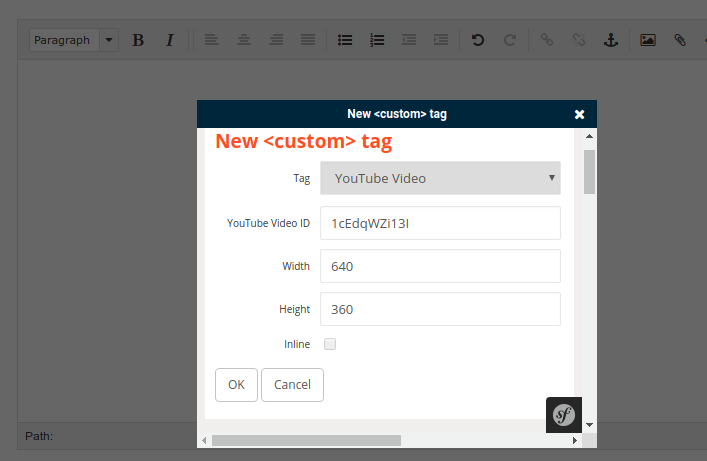
Then you can use the custom tag as usual with the Online Editor:
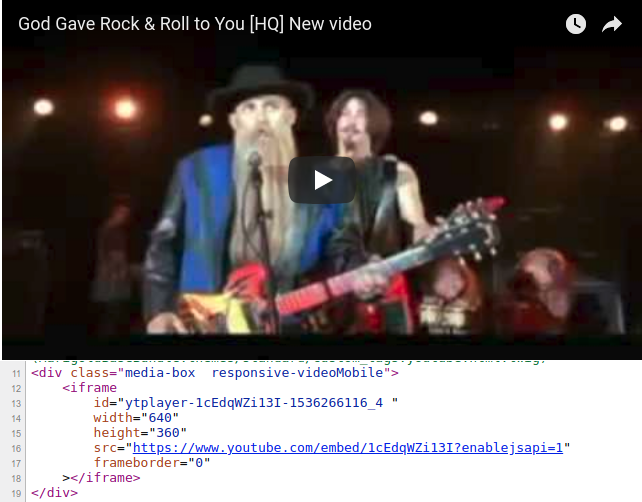
And see the result in the front end:
While we like to use XSL for some use cases, we think that it makes much more sense in terms of flexibility and consistency of the developer experience to use Twig templates for custom tag HTML. This is in fact the approach that eZ Platform has taken for version 2.x, but now you can enjoy the same benefits on a legacy bridge install!